One of the most important tools for understanding your poker data are filters. By letting you focus on particular slices of your data, filters allow you to cancel out the noise and identify the nuggets of knowledge within.
Because filters are so important, we’re breaking this guide up into two parts. In this first article, we'll go over the basics on the different types of filters and how to add them to your visualizations. Once you’re done with this article, and are ready to find out more about filters, be sure to check out the second article on Advanced filtering.
Available filters
There are over 400 filters to choose from in Pokeit. There are filters for game type, tournament type, time of day, and holecards. You can filter on actions in the hand by either the hero or the villain. Any number of filter can be combined together and you can save the ones you like for later. The five common filter types are:
- True/False: These are your yes or no filters. Examples include ‘Hero’, ‘3bet’, ‘Run-it-twice’. All you need to do is flip a switch to turn them on or off
- Number: Numerical filters are commonly used for pot, winnings, or bet size amounts, but also include things like number of players at the table. Just type in a value and select a >, < or = to complete the filter
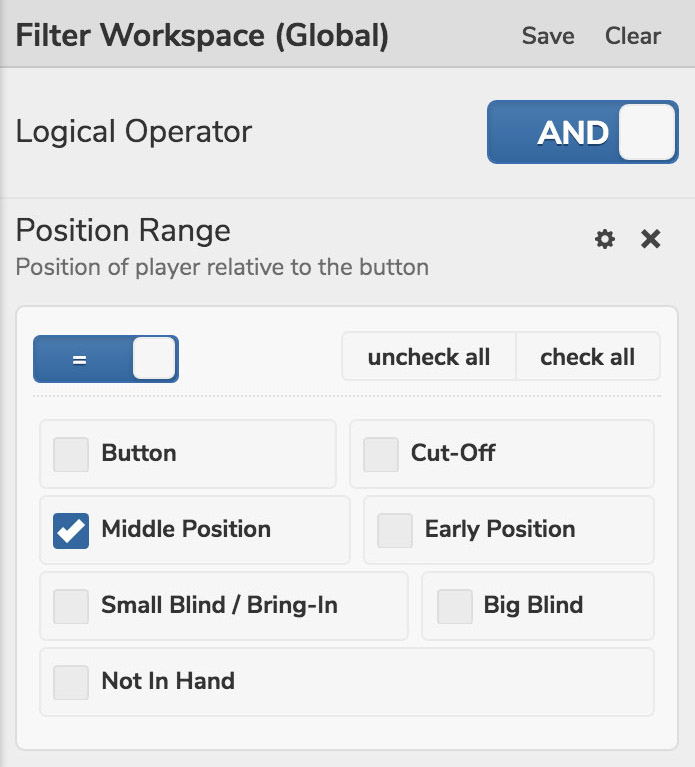
- Category: Category filters are used when the data can take one of a handful of known values, like game, stakes, or position. Checkboxes are used for interacting with this filter
- Text: Player name, table name, or tournament name. These are the non-numerical fields that can take on any value. Just type in what you want to search, even if it’s just a part of the name, and it will update
- Time: Pokeit records the date and time for every hand you’ve played. We also track when your tournaments and sessions start and end. With time-based filters, you can filter down to the second or chunk your data by year, month or even time of day
Adding filters

There are two ways to add filters to a visualization in Pokeit:
- Click on the gear icon to open the settings panel, then click on the filter button in the top left. You can then search for a filter or click on the ‘Add Filter’ button to open the full list
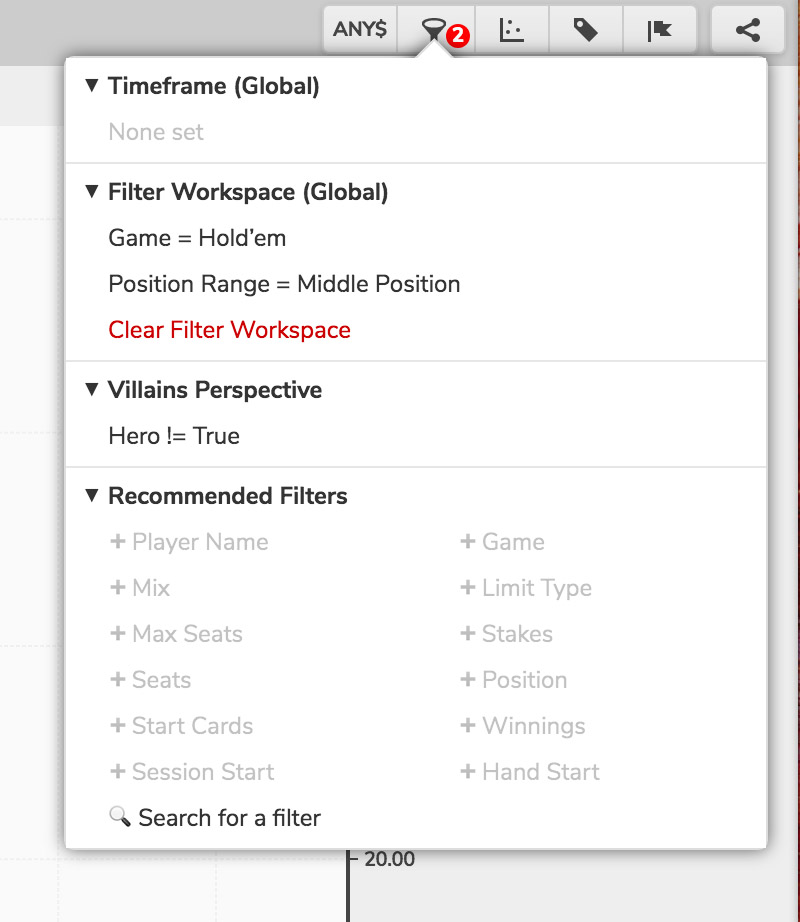
- Click on the filter button in the toolbar. This opens the filters dropdown. Choose from one of the recommended filters at the bottom or click on the search button to search through the full list
The quick filters dropdown is also useful for seeing what filters have been set. A global timeframe which acts across all your visualizations and dashboards can also be found here.
The Filter Workspace

When you add a filter in Pokeit, it goes into the Filter Workspace. The Filter Workspace is a shared space between all your open visualizations. Set a filter in one visualization and it gets updated in all the rest. This makes it easier to set a filter and then get several different views of the same data just by opening different visualizations.
You’ll notice that some filters are not part of the Filter Workspace. Most visualizations include a ‘Hero Perspective’ or ‘Villains Perspective’ section above the Filter Workspace. These are what we call ‘saved filters’. They work only on the visualization you’re looking at. Saved filters can include multiple filters within them if you’d like.
You can create a saved filter from your Filter Workspace by clicking on the button that says “Save” next to the title. Saved filters get moved out of the Filter Workspace and into a permanent position in the visualization.
We include a number of saved filters by default in Pokeit. You can check them out in the Asset Manager and add them to your visualizations just like any other filter.

